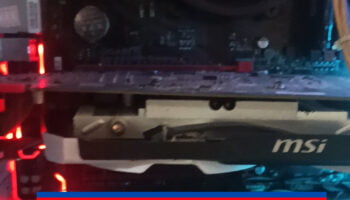
Modern motherboards are equipped with various built-in diagnostic tools, including one of the most powerful aids for troubleshooting, the LED error indicator system. These LED lights provide immediate feedback on your computer’s hardware status, helping you quickly identify potential issues with components like the CPU, RAM, or GPU.
When used alongside traditional diagnostic methods like the motherboard speaker, which emits error beep codes, and visual inspection techniques, such as checking for bent CPU pins or improperly seated components, you can effectively diagnose and resolve hardware problems.
In this guide, we’ll walk you through the importance of LED error indicators, how to interpret motherboard beep codes, and the value of visual inspections during troubleshooting. Understanding these tools will enable you to efficiently pinpoint hardware issues and restore your system’s functionality with ease.
The Role of LED Indicators in Diagnosing Computer Errors
LED indicators can help identify specific hardware problems in your system. They act like small beacons of light, flashing or staying solid to signal where an error might be occurring. These LEDs typically correspond to various components like the CPU, RAM, or GPU, and understanding their behavior can save you time during troubleshooting.
High-end motherboards often feature a digital error code system where numbers or codes are displayed via LEDs. This advanced setup makes it easier to pinpoint problems, as you can reference the motherboard’s manual to decode the LED readouts.
Common LED Indicators and Their Meanings
1. Blinking Red Light – Memory Issues
If you encounter a blinking red light on the motherboard, it often indicates that the system is having trouble reading the memory installed. The first step to troubleshoot this issue is to reseat the RAM in different slots or swap the RAM sticks if available. If the problem persists, the memory module might be faulty and require replacement.
2. Solid Red Light – CPU Problems
When the LED associated with the CPU is constantly lit, it suggests that there is an issue with the processor. This could range from something simple, like improper seating, to more complicated issues like bent pins on the CPU socket. In cases like these, you may need to carefully inspect the socket and the CPU pins, realigning any bent pins using a microscope or zoom lens if necessary. If the issue remains unresolved, the CPU itself might need to be replaced.

3. LED Number Codes
On some higher-end motherboards, LED number indicators provide even more precise error codes. These can help you track down a wide variety of problems beyond just memory or CPU issues. Referencing the motherboard’s manual will guide you on what specific codes mean and how to troubleshoot them.
Using LED Indicators Alongside a Motherboard Speaker
Another traditional method of diagnosing issues is using a motherboard speaker that emits beeps corresponding to various error codes. While LED indicators have largely replaced these speakers on newer motherboards, combining both methods can give you a clearer picture of what’s wrong with your system.
LED indicators and motherboard speakers together form a powerful diagnostic duo, helping users identify hardware malfunctions without the need for expensive diagnostic tools.
Visual Inspection: The Power of Observation
In addition to relying on LED error indicators and motherboard speakers, performing a visual inspection of your hardware can often reveal the root of the problem. Start by carefully examining the CPU socket for bent or misaligned pins, which can prevent the system from booting properly.
Check that the RAM modules are securely seated in their slots and that the GPU is properly connected. Look for signs of physical damage, such as burns, corrosion, or bloated capacitors, which might indicate power or overheating issues.
Cables should also be inspected to ensure they are firmly connected and undamaged. Often, a thorough visual check can identify issues that might not be immediately apparent through LED indicators or error codes.
Video of Motherboard Troubleshooting
Conclusion
Mastering the use of motherboard diagnostic tools, such as LED indicators and speakers, alongside the practice of careful visual inspection, is key to efficiently maintaining and repairing your PC.
These methods, when combined, provide a comprehensive approach to troubleshooting hardware issues, whether it’s memory problems, CPU malfunctions, or more complex errors involving multiple components.
With this knowledge, you can address issues quickly and confidently, preventing minor problems from escalating into costly repairs. Always remember to handle hardware with care, discharge static electricity, and ensure all components are compatible and properly installed.


